

Create a Static Survey
Build a fixed set of questions, review the participant experience, and publish a survey you can share with your team.
A Static Survey asks every participant the questions you write. Use one when you want a consistent set of answers, such as a sprint check-in, workshop evaluation, or onboarding survey.
Before you start
Section titled “Before you start”Have a workspace you can access and a clear topic for the survey. Decide who should answer and what you will do with the feedback. If this is your first time using the builder, follow Your first survey for a worked example.
1. Create a draft
Section titled “1. Create a draft”- Open Surveys in the app sidebar.
- Select New survey.
- Choose Static survey.
- Select Continue with Static.
The builder opens with a draft called Untitled survey. Its three steps are Setup → Questions → Send.
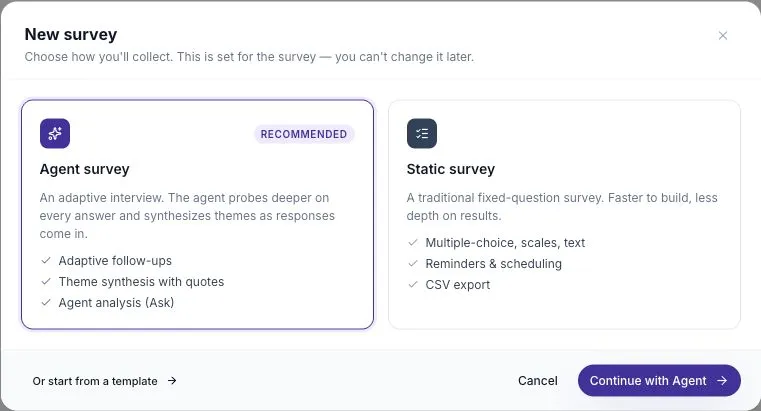
Choose the mode before creating the draft. A survey cannot switch between Static and Agent later.
2. Set up the survey
Section titled “2. Set up the survey”Complete the Setup step:
| Control | What to enter or check |
|---|---|
| Survey name | A specific title, such as “Sprint 24 health check” |
| Audience description | A note about who the survey is for; this does not restrict access |
| Estimated time to complete | A realistic estimate that participants can use to plan their time |
| Anonymous responses | Whether feedback should be collected without a participant identity; availability depends on the plan |
| Allow partial submissions | Whether answers can be saved as participants go so they can resume later |
| AI follow-up questions | A paid option for follow-up questions after submission |
On Free, the anonymous-response and AI follow-up controls show an upgrade requirement. Leave them off if you are following the standard Free workflow.
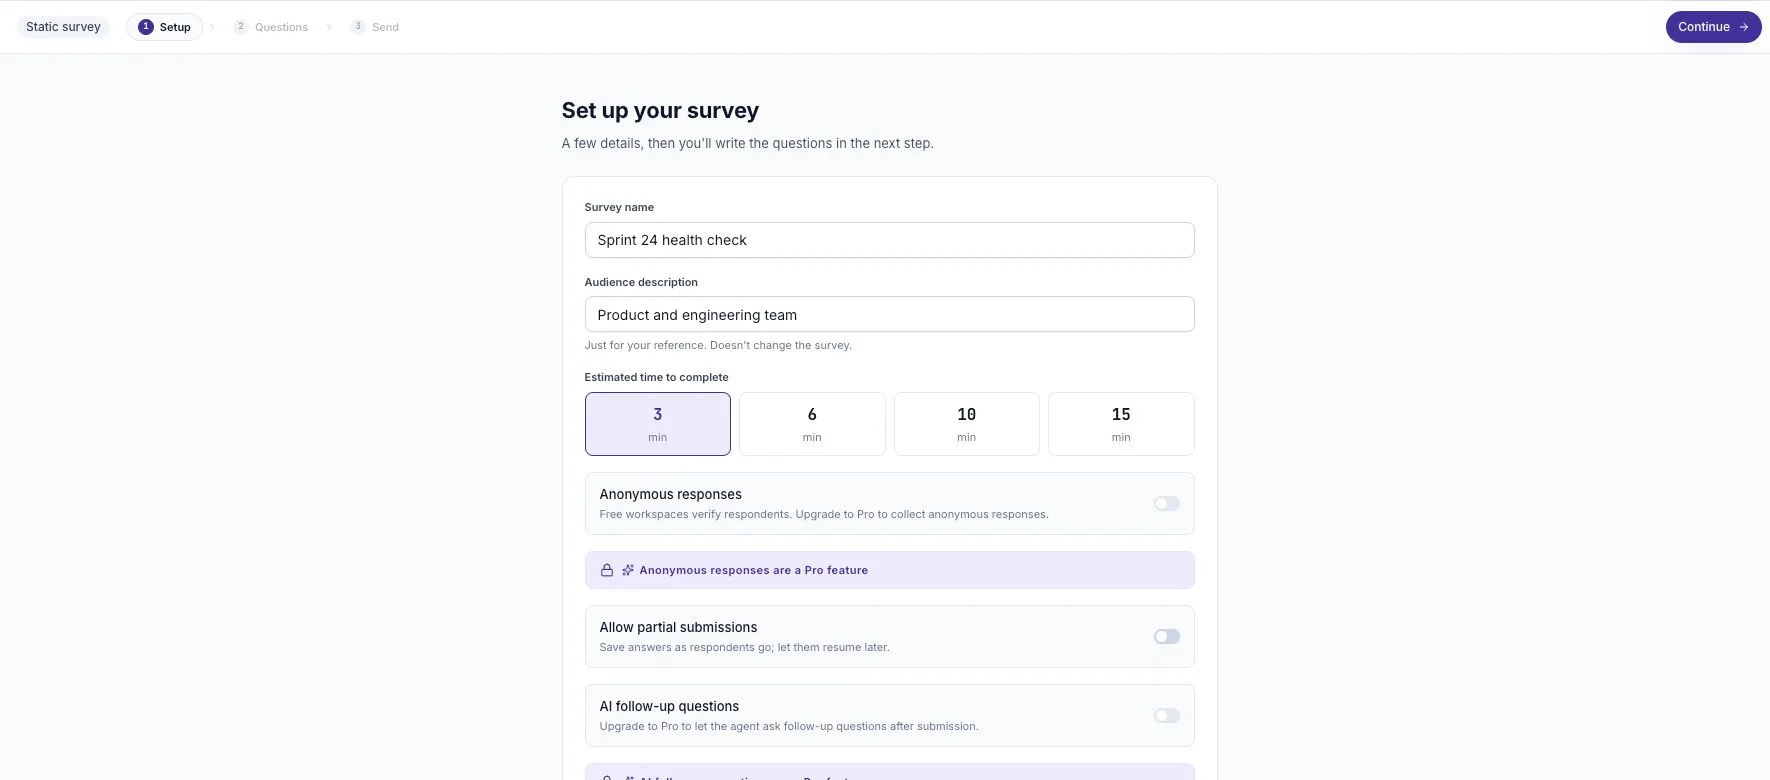
Select Continue to move to Questions.
3. Write the questions
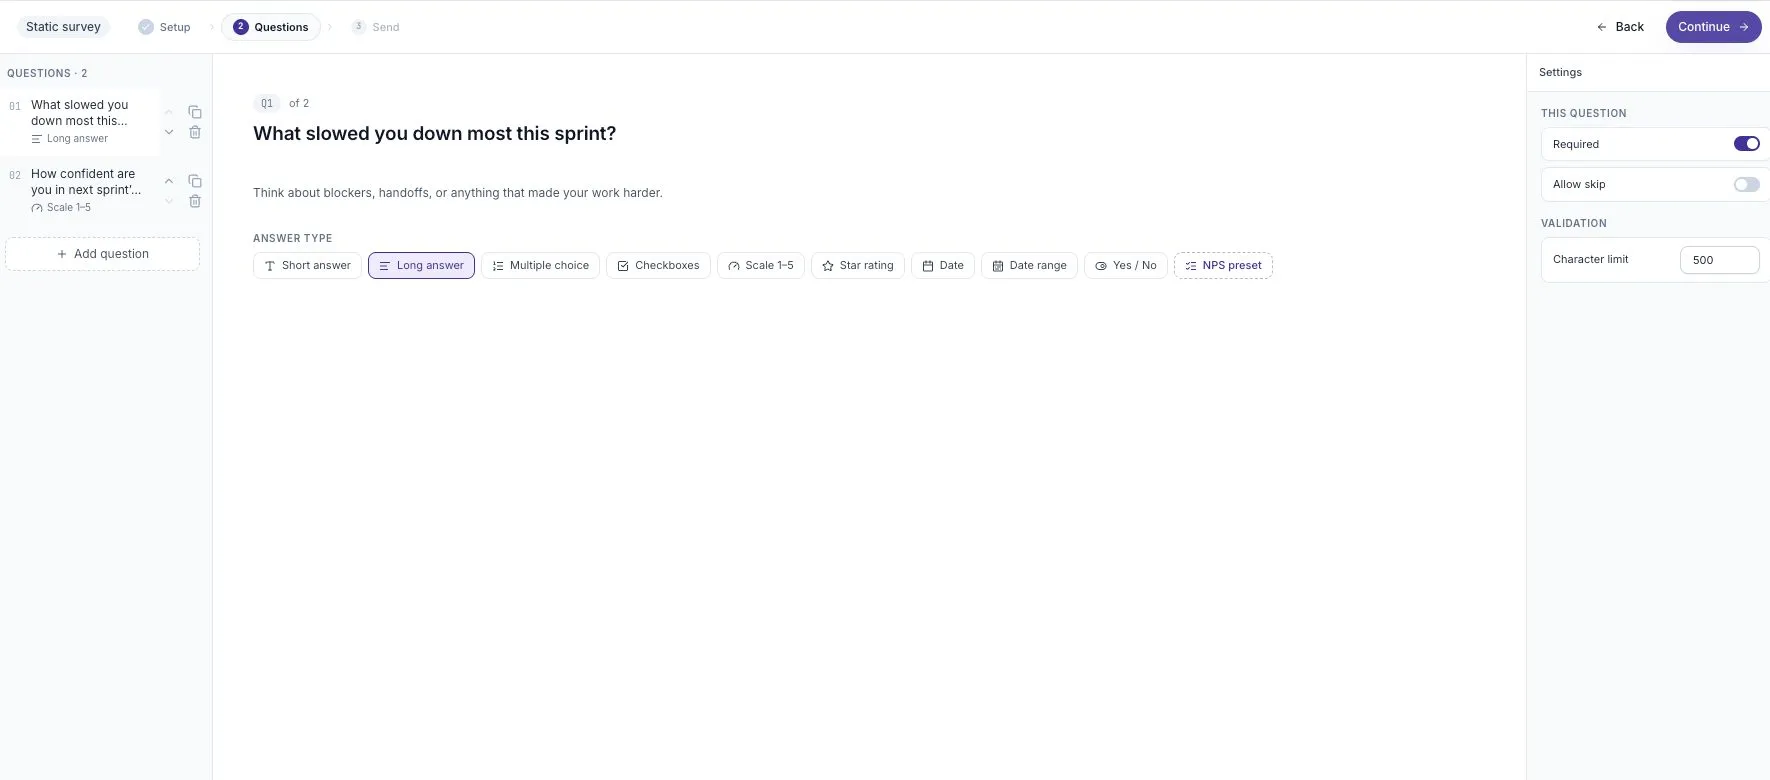
Section titled “3. Write the questions”- Select the first question in the list.
- Replace the placeholder in Question text.
- Add Helper text if people need an example or instruction.
- Select the answer type.
- Check Required, Allow skip, and any type-specific settings.
- Select Add question for each additional question.
Use the up and down controls beside a question to change the order. Keep each question focused on one topic. See Question types for the nine formats and NPS preset.
4. Review and publish
Section titled “4. Review and publish”Select Continue to reach Send. Review the number of questions, time estimate, required questions, and identity setting. Read the questions as if you were answering it yourself.
Select Publish when the survey is ready. The same screen changes into the sharing surface, with Link & QR, Email, Schedule, and Embed tabs.
5. Share and review responses
Section titled “5. Share and review responses”Copy the link under Link & QR, or choose another distribution method. Publishing alone does not send an email invitation.
When feedback arrives, open Responses and transcripts. Read the actual answers before drawing conclusions from totals or summaries.
If you cannot continue
Section titled “If you cannot continue”Check the current step for missing details or incomplete questions. If a control is disabled with an upgrade message, it is unavailable on your your plan. If questions are locked, you are viewing a published survey; use Duplicate survey to make an editable copy.