Retros at a glance
A short tour of retrospectives in ScatterSpoke — where they live, how to create and configure one, what the board looks like, and what you get when it closes.
Whether you’re running your first retro in ScatterSpoke or your fiftieth, the flow is the one you’d expect: collect feedback, group it, vote, and review. This page is a tour of the essentials. For the full working reference, see Running a retro.
Where to find retros
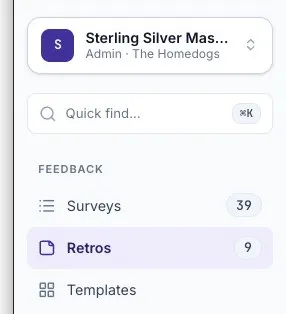
Section titled “Where to find retros”The left sidebar is home base. Retros sits under Feedback, with a live count of the retros in your workspace.
Surveys, Quick find, and Templates sit alongside it. Templates has a home of its own — browse every retro format directly, not only when you’re creating a board.
The Retros list
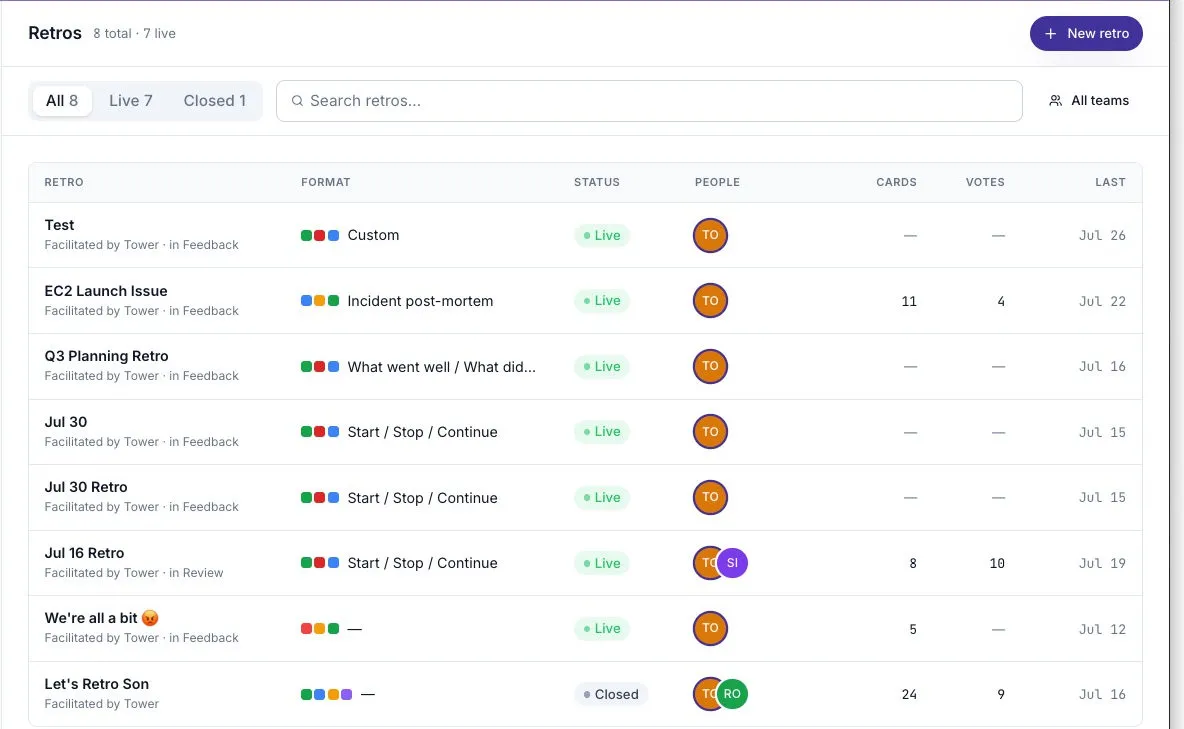
Section titled “The Retros list”Retros is a true list rather than a card grid, and it tells you a lot at a glance: format, status, who took part, cards collected, votes cast, and last activity — one row per retro. Filter by All, Live, or Closed, search by name, or narrow the view to a single team by selecting All teams.
Creating a retro
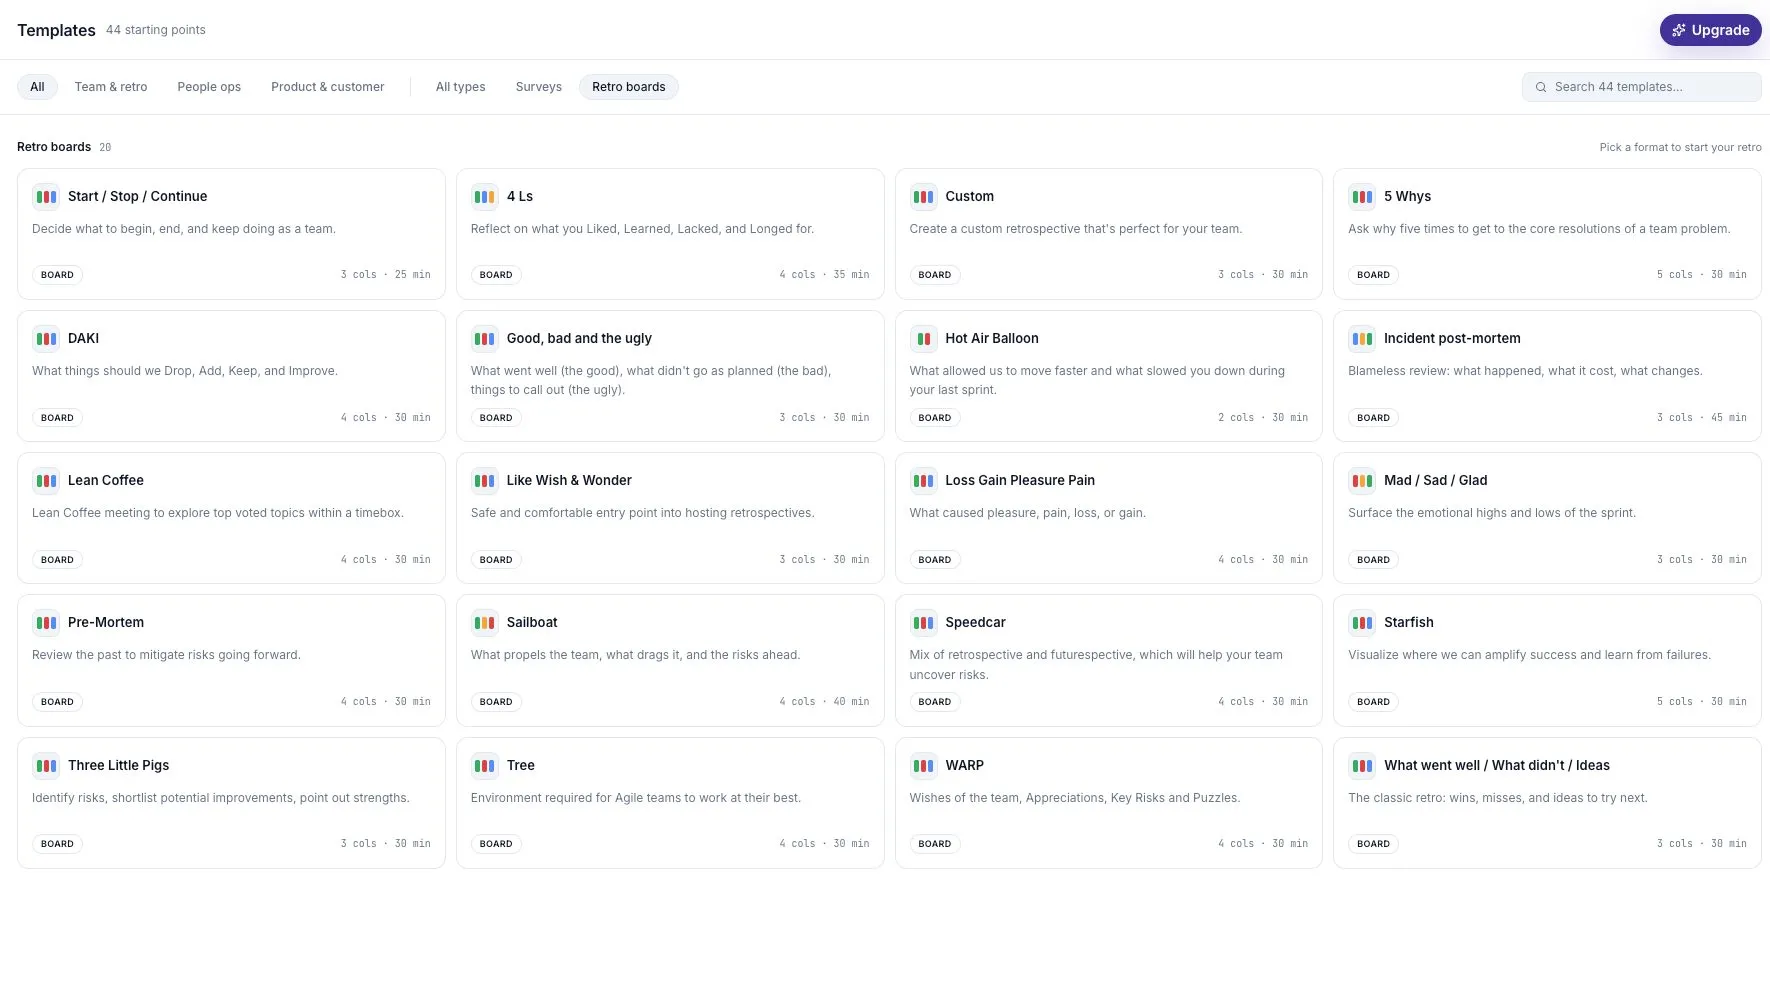
Section titled “Creating a retro”The purple New retro button sits in the upper right corner of the Retros list. It drops you into the templates gallery, already filtered to retro boards — pick one of the 20 formats and you’re one step from starting. See Retro formats for what each one is good for.
Configuring your retro
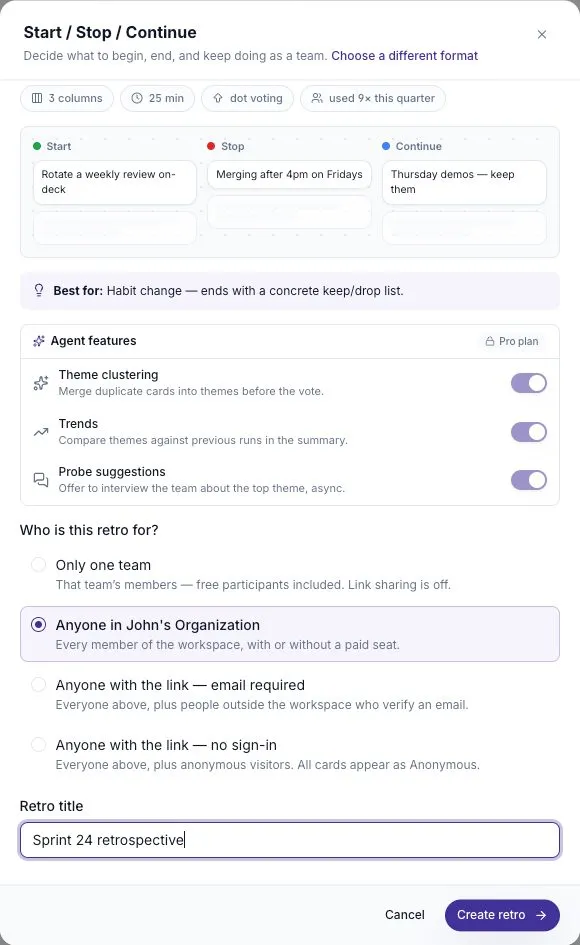
Section titled “Configuring your retro”The configuration panel is where you turn on Agent features (Pro), name the retro, and answer Who is this retro for?
- Only one team — that team’s members, free participants included. Link sharing is off.
- Anyone in your organization — every member of the workspace, with or without a paid seat.
- Anyone with the link, email required — everyone above, plus people outside the workspace who verify an email.
- Anyone with the link, no sign-in — everyone above, plus anonymous visitors. All cards appear as Anonymous.
Then select Create retro in the bottom right corner. For the access options in depth, see Inviting participants and guest links.
The retro board
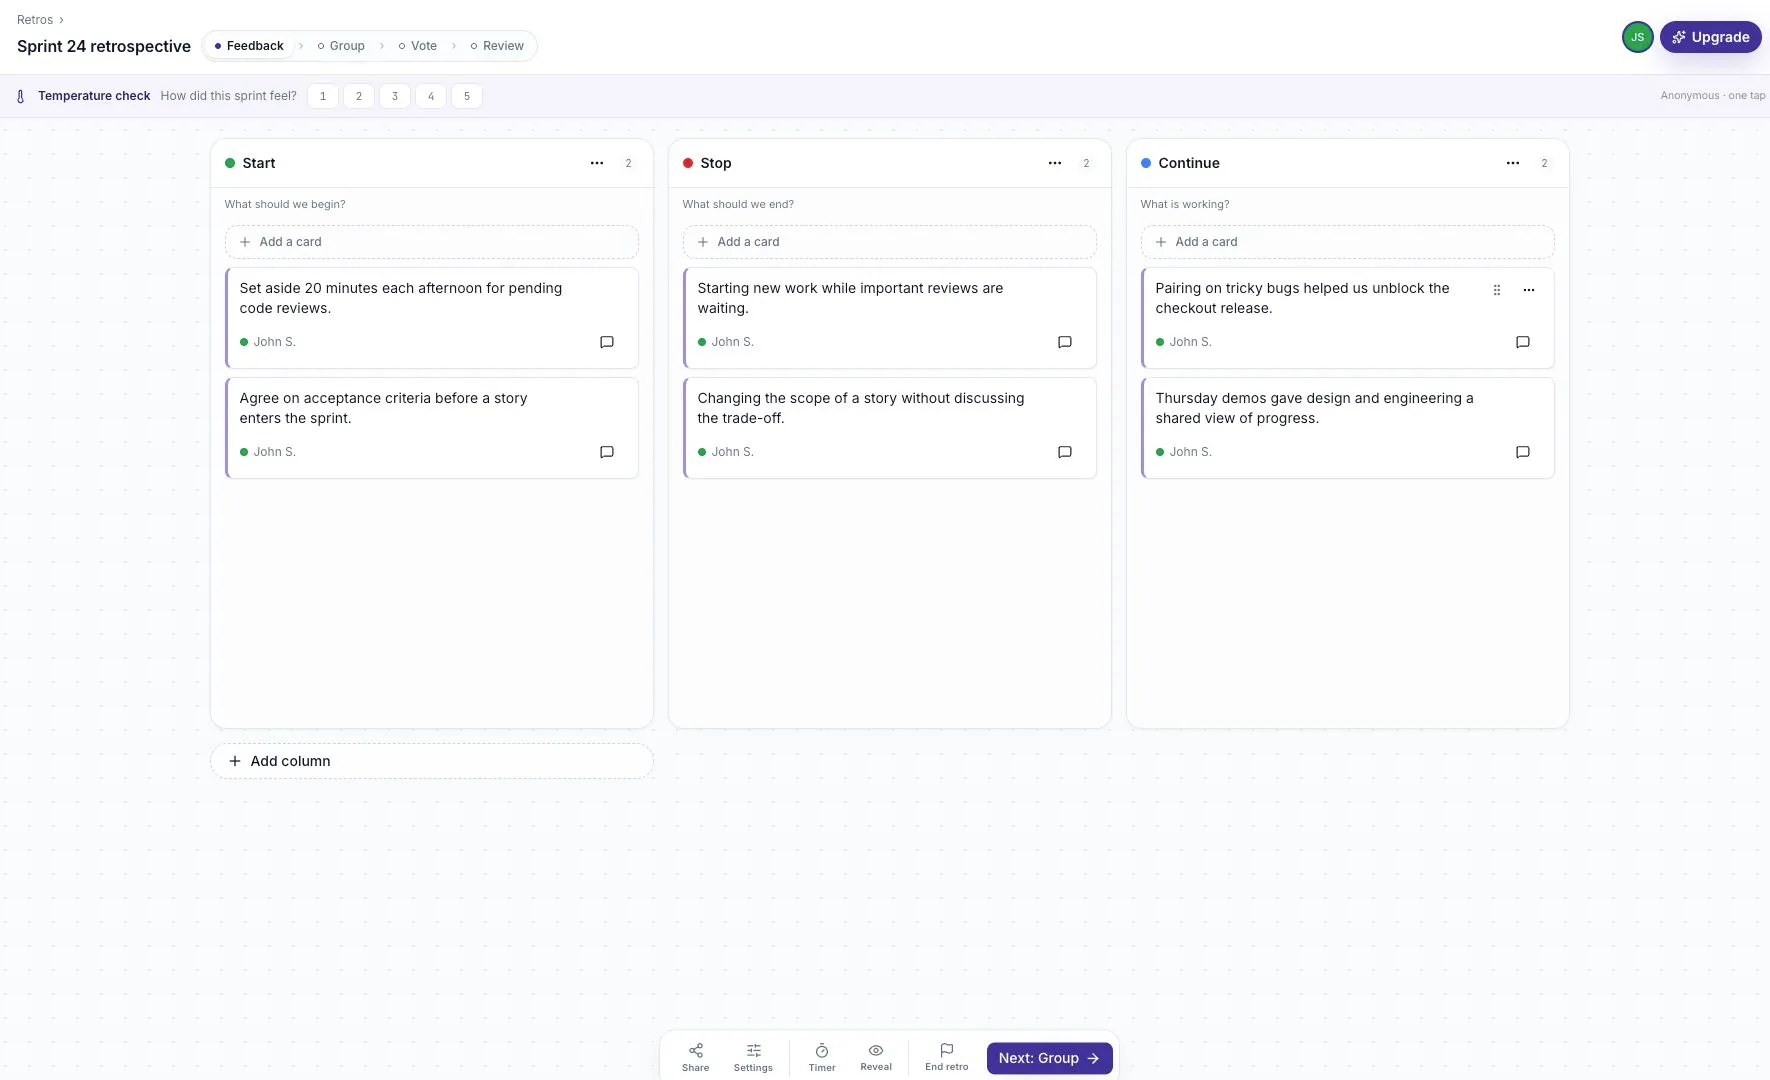
Section titled “The retro board”The board keeps a familiar shape: a column per prompt, cards added and edited in place, and the facilitator’s controls gathered into one toolbar — the dock — along the bottom. Above the columns sits the Temperature check poll: a single anonymous tap that captures how the sprint felt.
Retro phases
Section titled “Retro phases”A guided retro moves through four phases: Feedback → Group → Vote → Review.
Group sits between Feedback and Vote. Drag related cards together into a named group, and the team votes on it as one topic. Group with AI (Pro) groups every card on the board into named themes for you — run it first, or after grouping a few by hand; your own groups stay untouched. See Group and vote in a retro for the walkthrough.
Facilitation styles
Section titled “Facilitation styles”There are two styles to choose from:
- Guided moves everyone through the retro together and gates each activity to its phase.
- Live is an open board — no stepper, no spotlight. Cards and votes at any time.
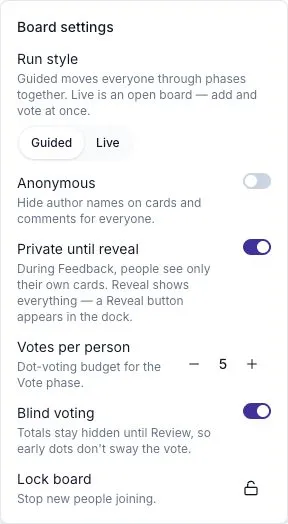
Switch styles at any point from Settings in the dock, alongside anonymity, private-until-reveal, the vote budget, and blind voting.
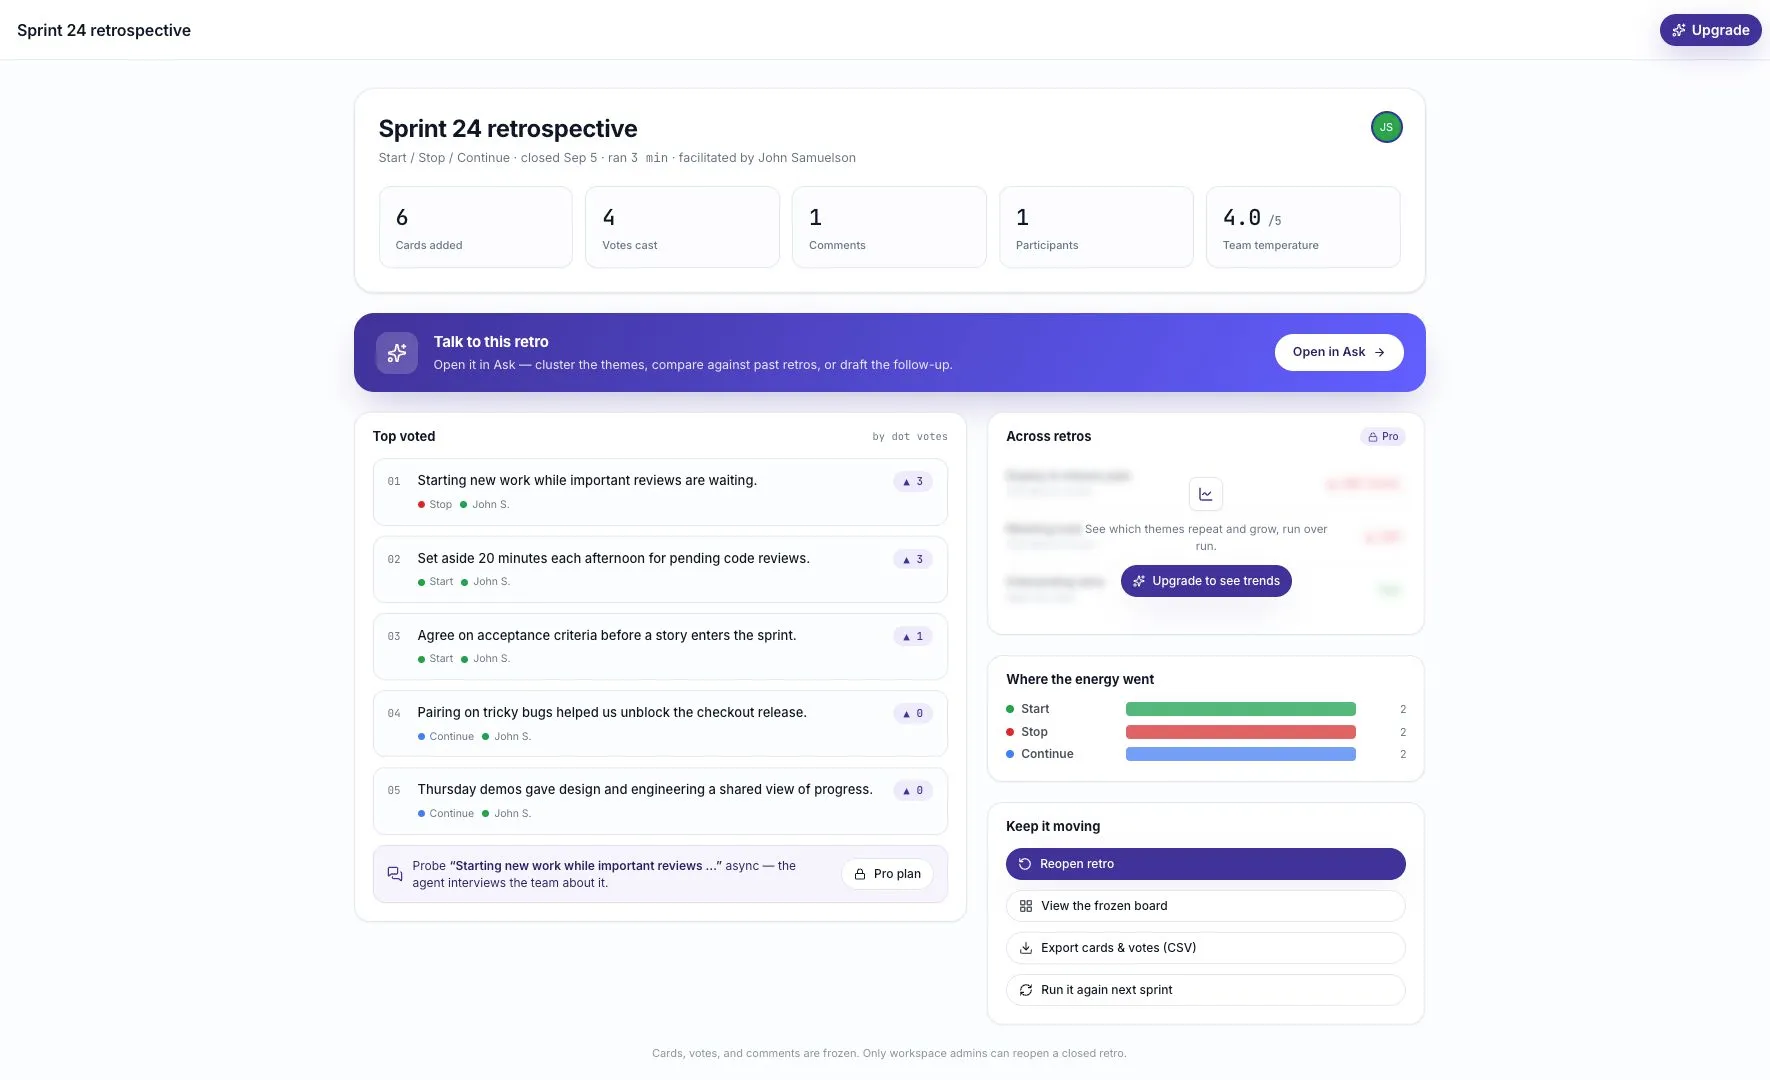
The retro summary
Section titled “The retro summary”The retro summary closes the loop. It opens with the numbers from the session, ranks the top-voted cards, shows how your themes compare against previous retros, and points you at what to do next. To get yours, select Finish & summarize or End retro in the dock. See Closing a retro.