

Your first retro
Create a board, collect feedback, group related cards, vote, and leave the discussion with a clear next step.
This walkthrough uses Start / Stop / Continue to review a sprint. Allow about 25 minutes with your team. You will finish with a saved summary of the board.
You need a ScatterSpoke workspace and access to create a retro. For this example, invite people who already belong to your workspace.
1. Create the board
Section titled “1. Create the board”- Open Retros in the sidebar and select New retro.
- In the template gallery, choose Start / Stop / Continue.
- Enter Sprint 24 retrospective as the title.
- Under Who can join, keep the workspace option selected.
- Select Create retro.
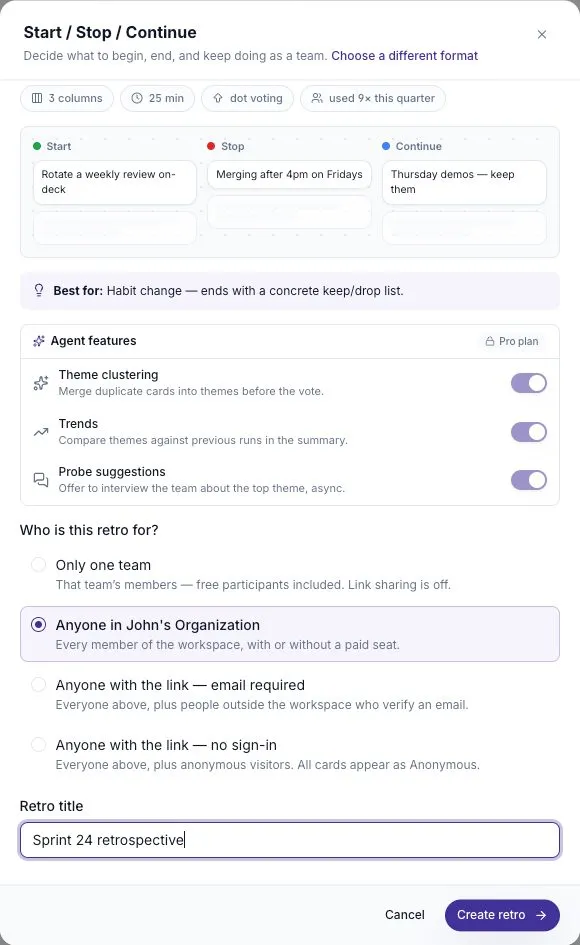
You created the board, so you are its facilitator. The guided workflow has four phases: Feedback → Group → Vote → Review.
2. Invite the team
Section titled “2. Invite the team”Open Share in the dock at the bottom of the board. Check who can join, then select Copy board link and share it with your team. People using the workspace option sign in before joining.
Do not assume that a board link grants access to someone outside the workspace. Guest options are explained in Inviting participants and guest links.
3. Give people time to write
Section titled “3. Give people time to write”Explain the three columns:
- Start: What should we begin doing?
- Stop: What should we stop doing?
- Continue: What is working and should stay?
Select Add a card in a column, write one idea, and press Enter. Ask everyone to keep each card specific. “Reviews sat for two days” is easier to discuss than “Communication.”
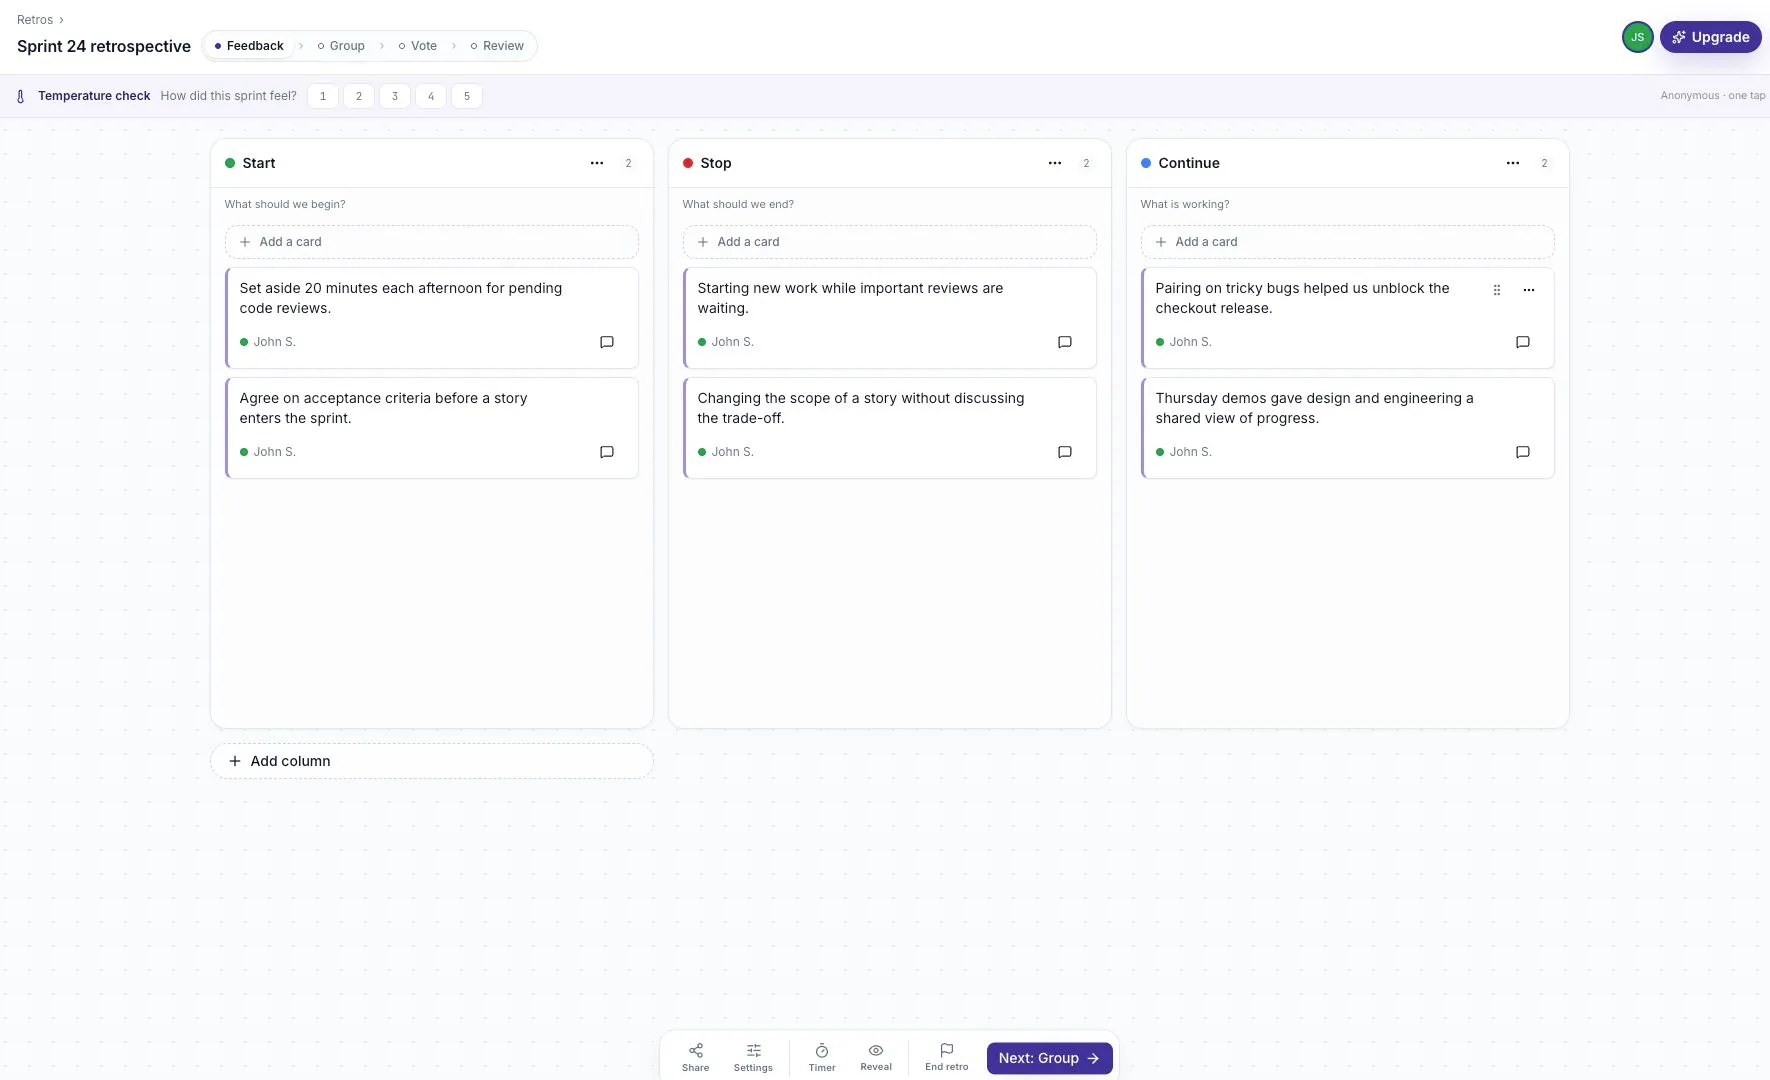
Open Timer and choose 5 min for a shared writing period. The timer does not advance the phase automatically.
New guided boards use Private until reveal. Participants see their own cards while other people’s feedback stays hidden. Tell the team about that setting before they write.
4. Read and group the feedback
Section titled “4. Read and group the feedback”When writing is finished, select Reveal so everyone can read the cards. Then choose Next: Group and confirm Move to Group.
Look for cards about the same topic. Drag one related card onto another and give the group a useful name. For this example, group the review-delay card with the suggestion to set aside review time. Name it Make code reviews flow.
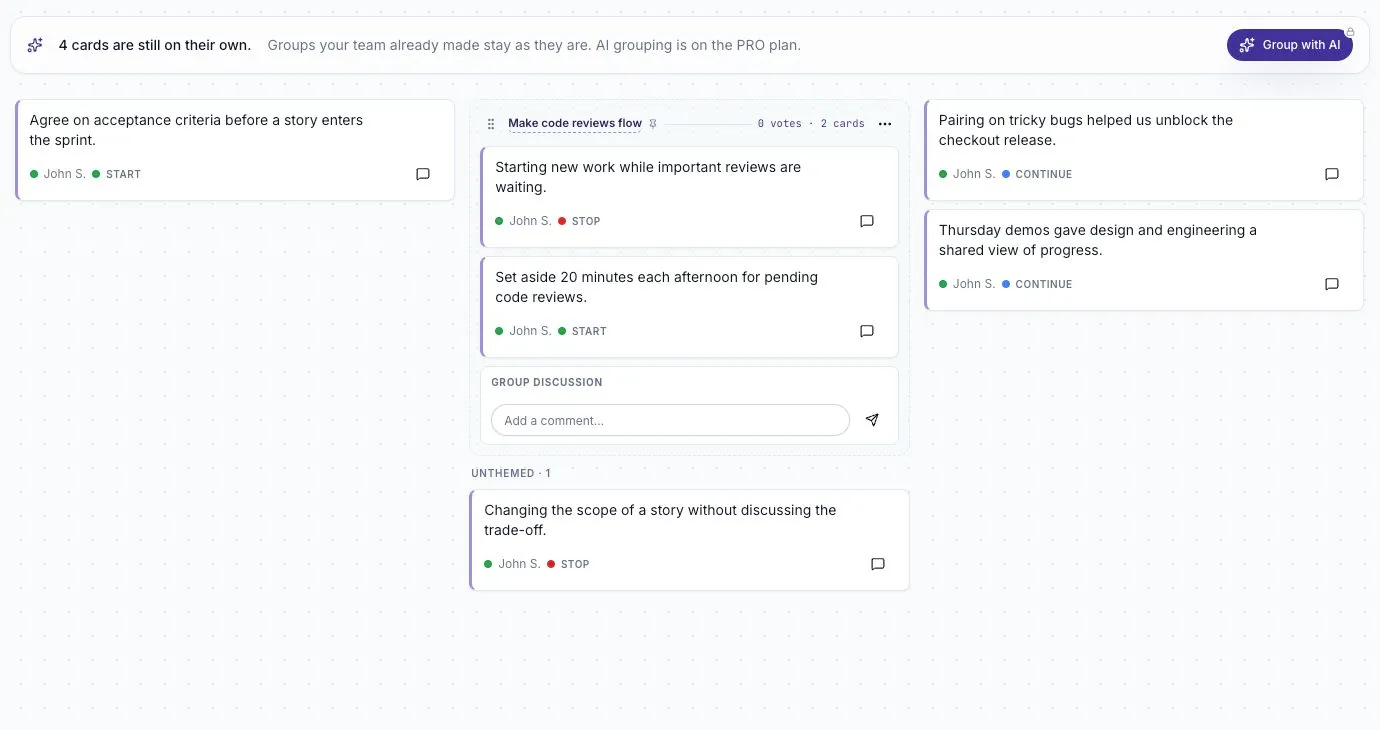
Leave unrelated cards on their own. Read Group related feedback for the full workflow.
5. Vote on what to discuss
Section titled “5. Vote on what to discuss”Select Next: Vote, then Move to Vote. Each person starts with five votes by default. They can add votes to individual cards or groups.
Blind voting is on by default: totals stay hidden until Review. Participants can see their own voting progress and select I’m done voting when finished.
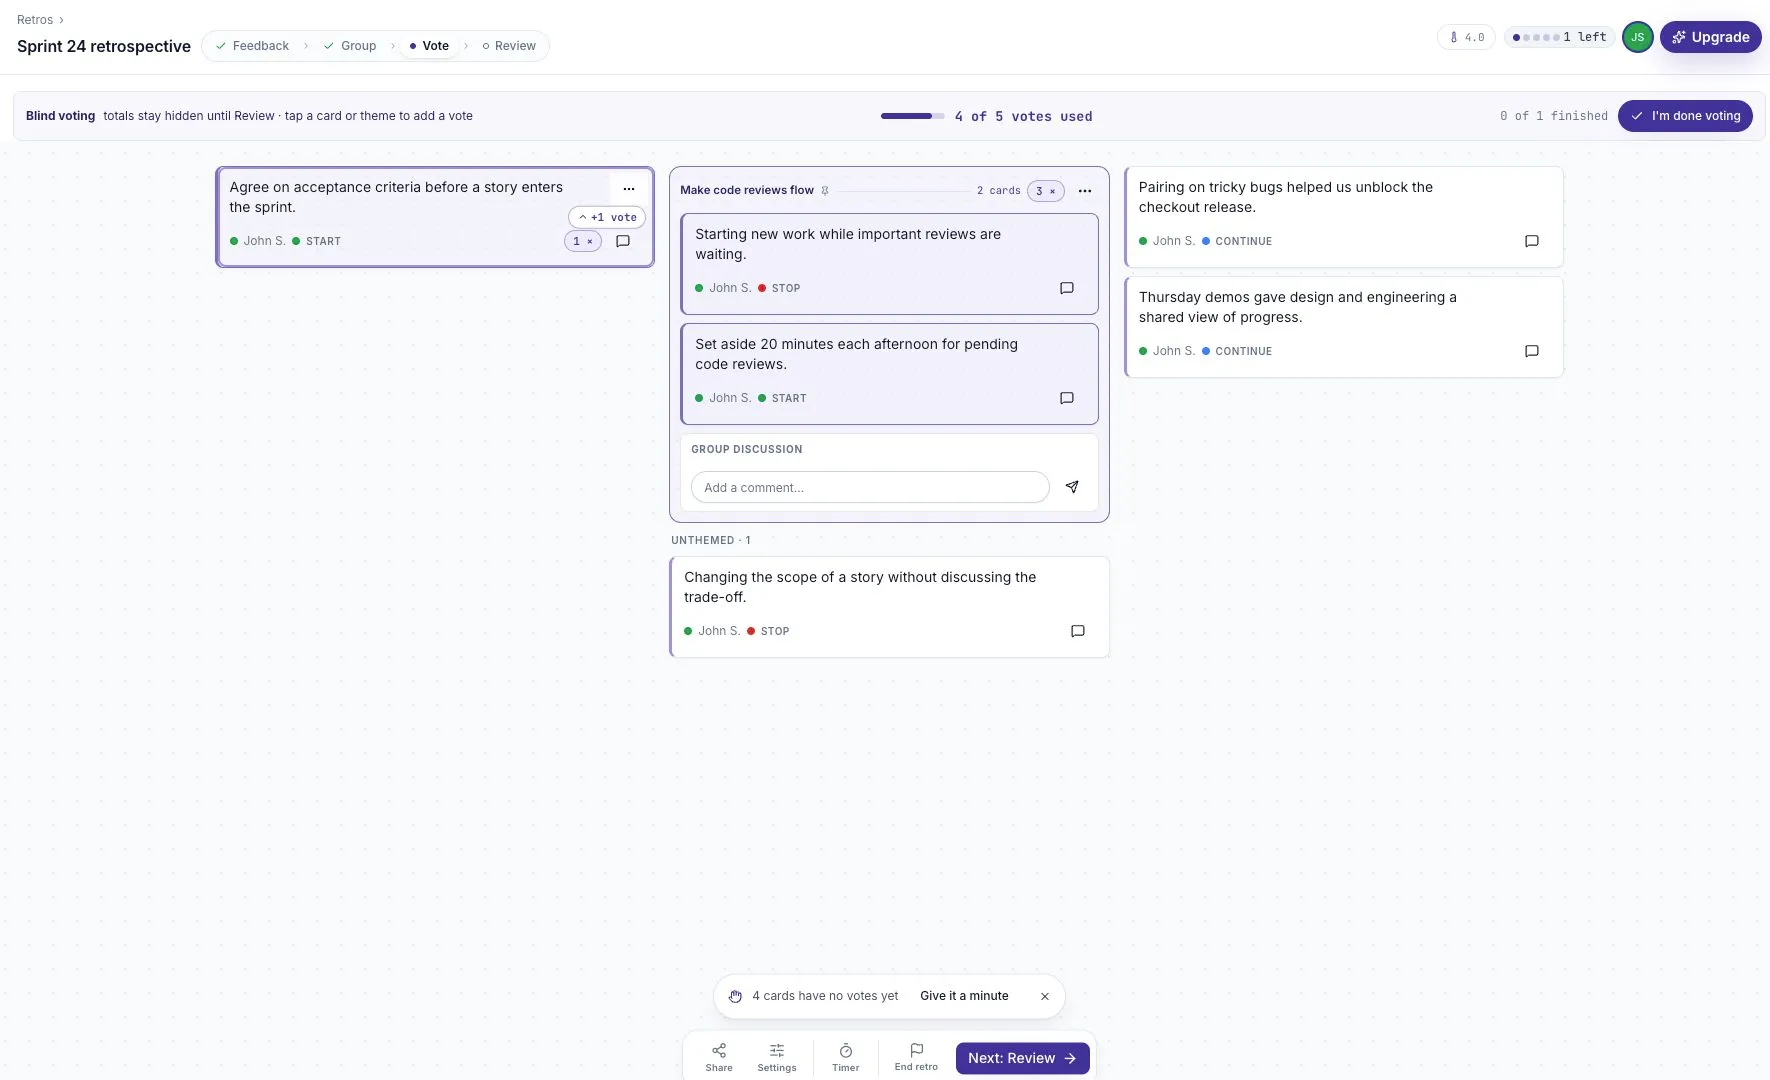
Give people a few minutes. Voting chooses a discussion order; it does not mean low-voted concerns should be dismissed.
6. Discuss and record a next step
Section titled “6. Discuss and record a next step”Select Next: Review, confirm the move, and select Start discussion. The discussion view puts the current card or group in front of everyone.
Ask what happened, what effect it had, and what the team can try next. Record the decision in the comment thread. Include an owner and a point when the team will review the result.
For example: “Try a 20-minute review window each afternoon for one sprint. John will coordinate it. Check waiting time at the next retro.”
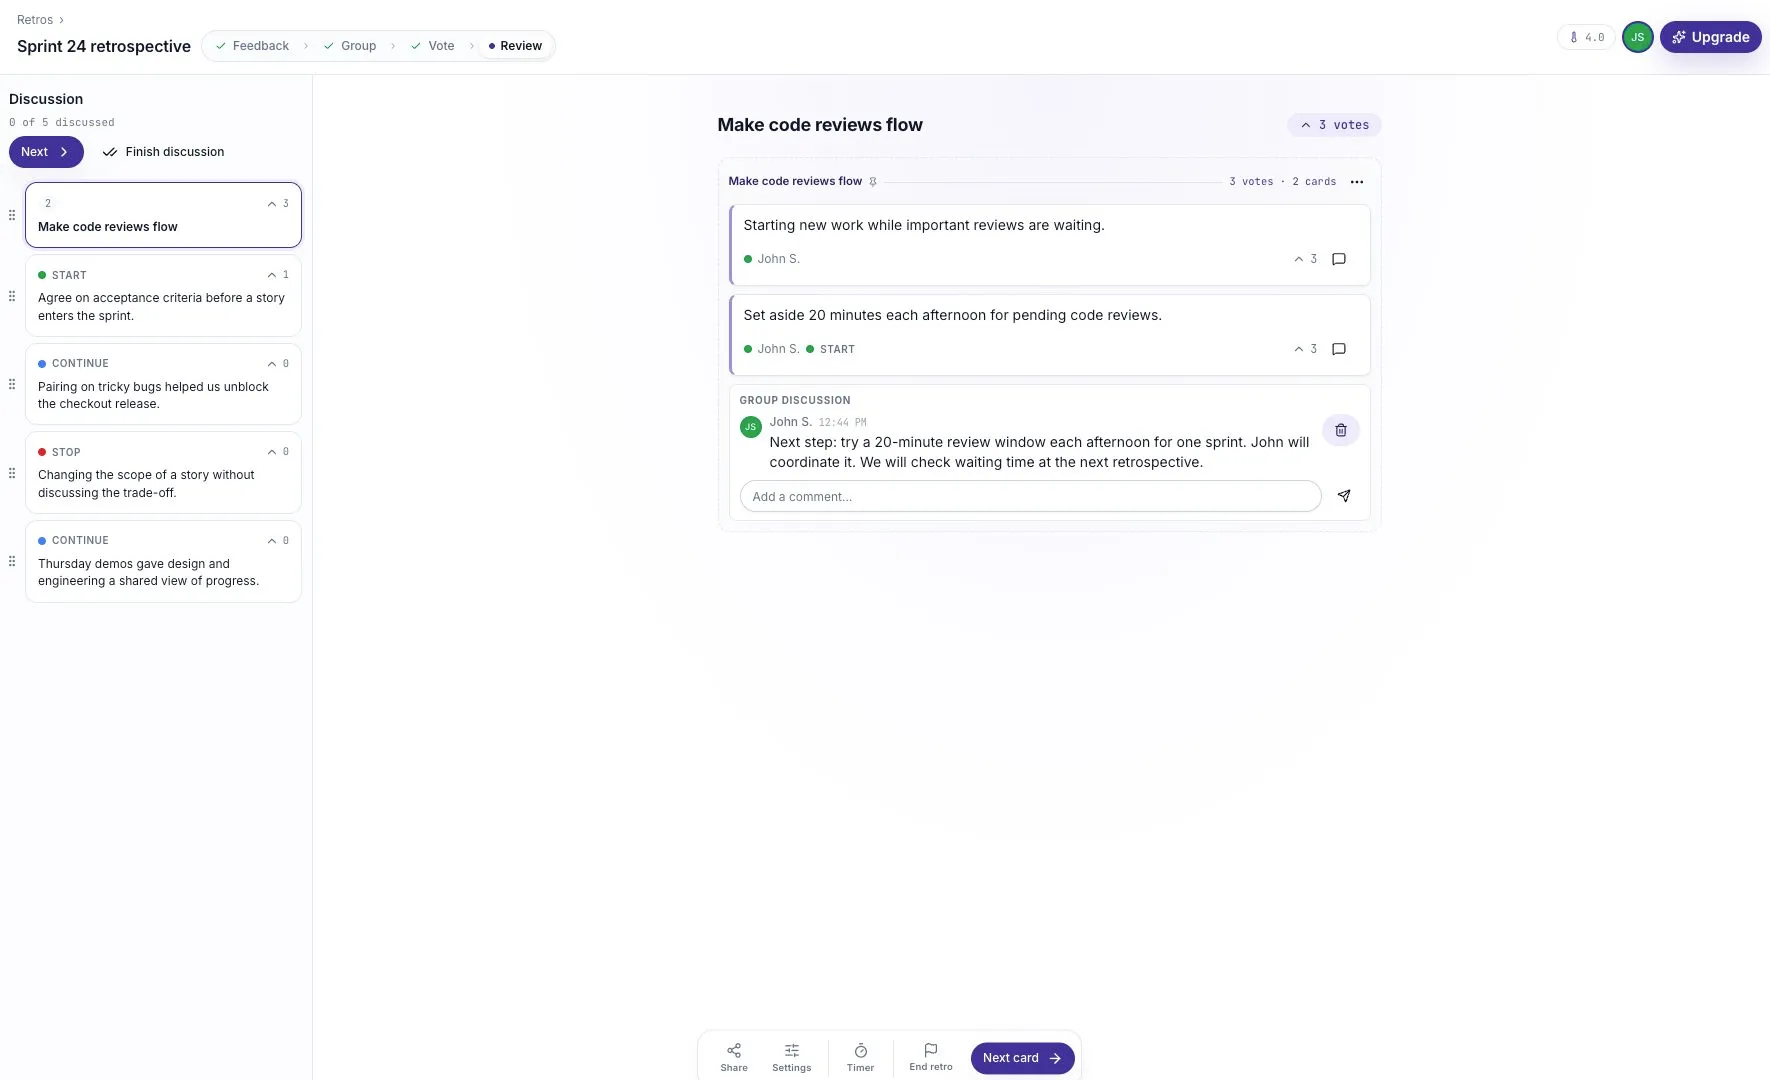
Use Next or Next card to continue through the topics. Focus on the most useful conversations rather than rushing through every card.
7. Close and keep the record
Section titled “7. Close and keep the record”Select End retro, check the card, vote, comment, and participant counts, then confirm End retro. The board becomes read-only and opens its summary.
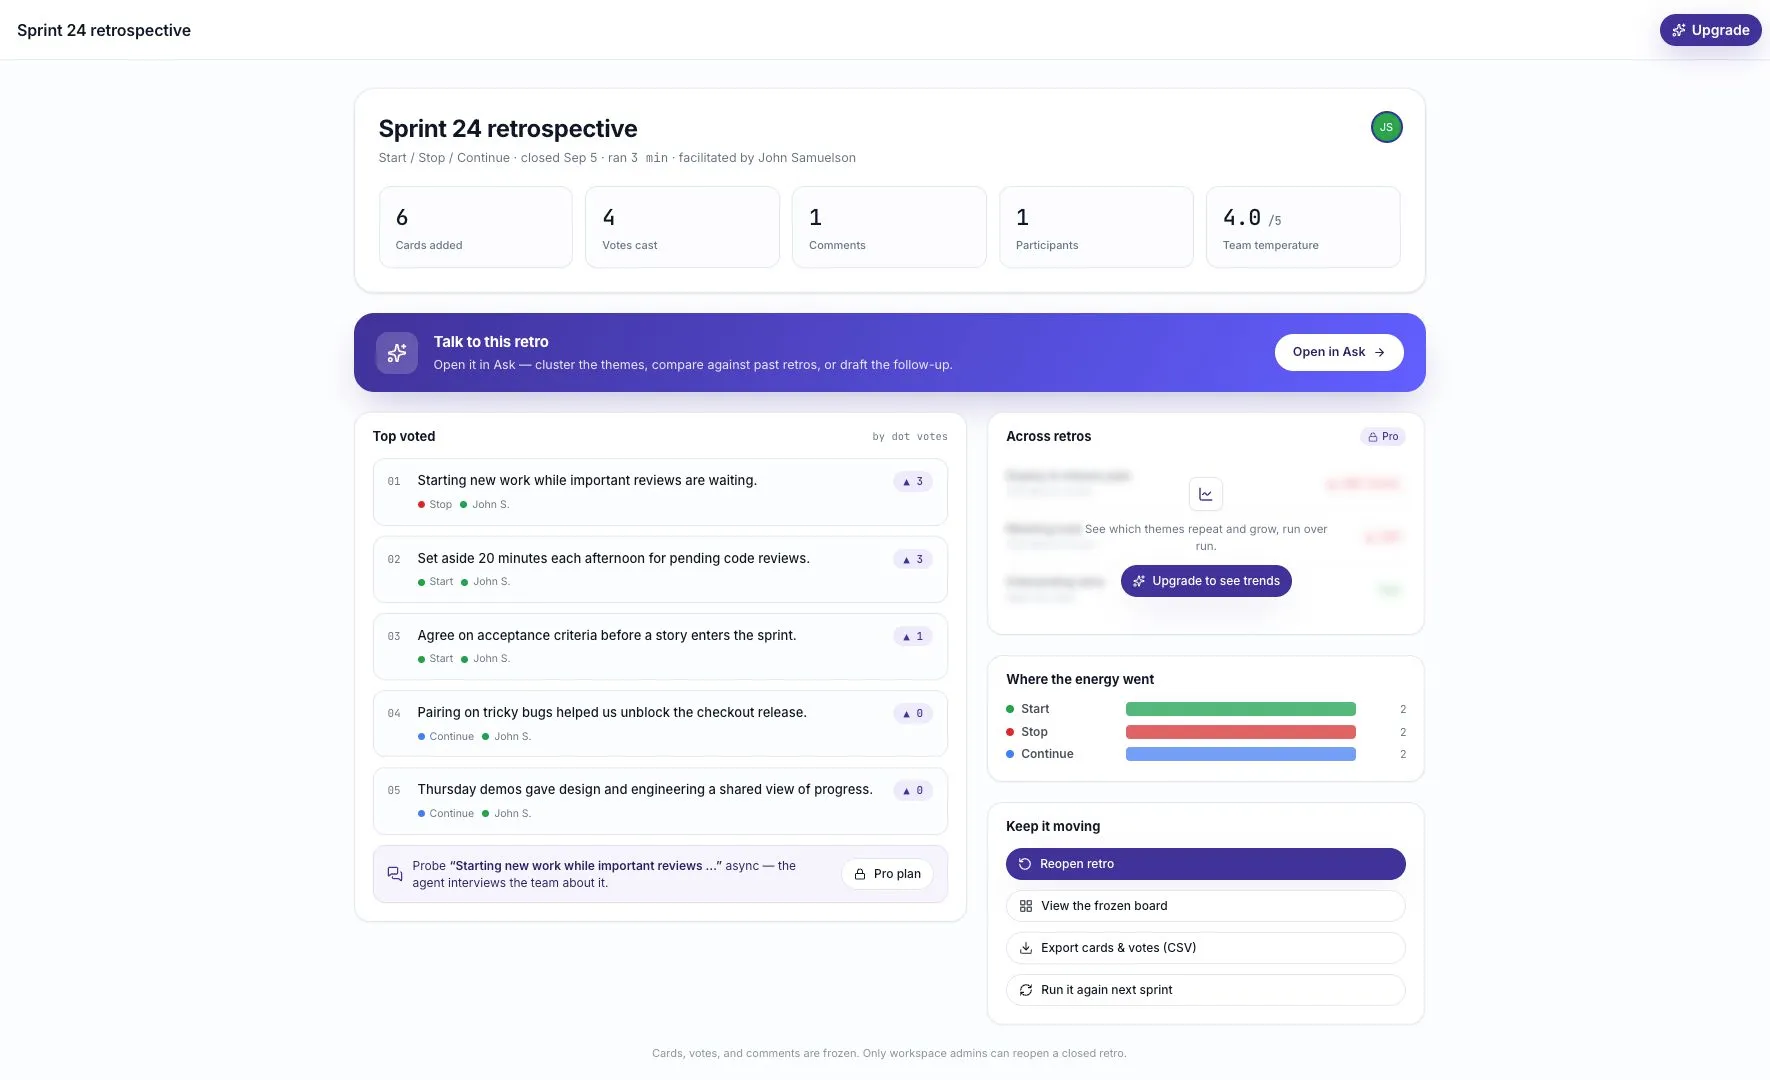
Use Export cards & votes (CSV) if you need a file. Workspace admins can reopen a closed board; use Run it again next sprint when you want a fresh session.
Next time
Section titled “Next time”Start by checking whether the action from this retro helped. Then use Retrospective best practices to improve the next conversation, or Running a retro to explore the facilitator controls.