

Running a retro
Create a board from a format, choose the run style and access mode, drive the phases, and end the session — the facilitator's working reference.
Use this guide to set up and facilitate a team session. For a worked example, follow your first retro.
Create the board
Section titled “Create the board”- Go to Retros and select New retro. You arrive in the templates gallery, pre-filtered to the Board type.
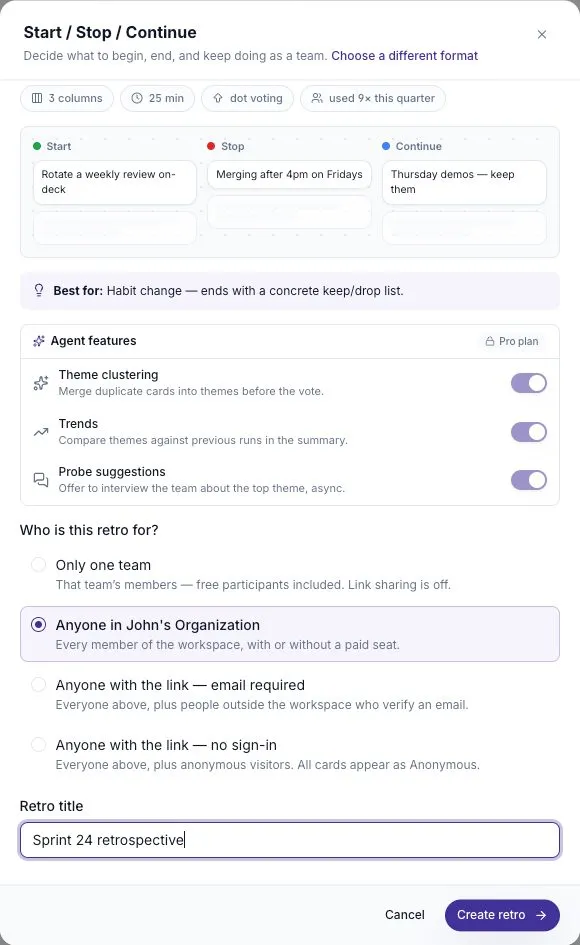
- Pick a format. Each card shows its columns, its column count, and a typical run length. See Retro formats.
- In the confirm panel, name the board and select Create retro.
The confirm panel is also where the retro’s three Agent features — theme clustering, trends, probe suggestions — are switched on or off for this board. They default to on and are only usable on a paid plan; on Free they show a lock and open the upgrade panel.
You become the board’s facilitator, and the board opens with these defaults:
| Setting | Default |
|---|---|
| Run style | Guided |
| Phase | Feedback |
| Who can join | Anyone in the workspace |
| Author names | Shown |
| Feedback | Private until reveal |
| Votes per person | 5 |
Review the access and privacy settings before people start writing. The Share panel also offers a single-team option.
Choose a run style
Section titled “Choose a run style”Open Settings in the facilitator dock.
Guided moves everyone through Feedback → Group → Vote → Review together, and gates each activity to its phase. Use it when you’re running the room.
Live is an open board — no stepper, no spotlight, cards and votes at any time. Use it for a continuous board the team tops up during the sprint, or when the session is really a working meeting rather than a facilitated one.
You can switch mid-session. Switching to Live hides the stepper for everyone immediately; switching back to Guided resumes at whatever phase the board is on.
Decide who can join
Section titled “Decide who can join”Open Share in the dock. Four options:
| Mode | Who gets in |
|---|---|
| Only one team | Members of the selected team, including free participants |
| Anyone in your workspace | Workspace members, including those without a paid seat |
| Anyone with the link — email required | Anyone with the join link who confirms an email once |
| Anyone with the link — no sign-in | Anyone with the join link, no sign-in, everyone appears as Anonymous |
Picking a guest mode creates a join link you can copy from the same panel. Rotate link issues a new one and disables the old one for new joiners — people already in the board keep their session.
Choosing Anyone with the link — no sign-in forces the board anonymous and always-visible, and locks both switches. Tell participants that feedback will be visible as they post. Full detail in Inviting participants and guest links.
Set the feedback rules before people write
Section titled “Set the feedback rules before people write”In Settings:
- Anonymous hides author names on cards, comments, and votes for everyone.
- Private until reveal means people see only their own cards during Feedback until you press Reveal.
Both are live switches, but change them before the writing starts. Turning anonymity on mid-session hides names retroactively; turning it off exposes names people wrote under the assumption of anonymity. See Private feedback and anonymity.
Run the Feedback phase
Section titled “Run the Feedback phase”Cards go in. Your jobs:
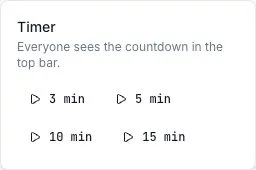
Timebox it. Dock → Timer → 3, 5, 10, or 15 minutes. Everyone sees the same countdown.
Watch the quiet. About five seconds in, a chip may appear above your dock: “3 people haven’t added a card yet.” Nudge them sends those people a gentle prompt — nobody is named publicly. The chip disappears once the condition resolves.
Reveal when the writing is done. The Reveal button only appears while the board is private and unrevealed; once pressed it’s gone, and the feedback becomes visible, with author names still controlled by the anonymity setting.
Group related feedback
Section titled “Group related feedback”Select Next: Group, then confirm Move to Group. This reveals the feedback and lets you bring related cards together. Drag one card onto another and rename the group so its purpose is clear. See Group related feedback.
Move to Vote
Section titled “Move to Vote”Select Next: Vote, then confirm Move to Vote. Blind voting is on by default, so totals remain hidden until Review. Participants can select I’m done voting when finished.
During Group, Group with AI can organize remaining cards on a paid plan. Manual groups are shown as pinned and protected from AI clustering. See AI theme clustering.
Adjust the budget in Settings → Votes per person if five is wrong for the number of cards on the board. Changing it mid-vote re-computes what everyone has left. See Timer and votes.
Run the Review
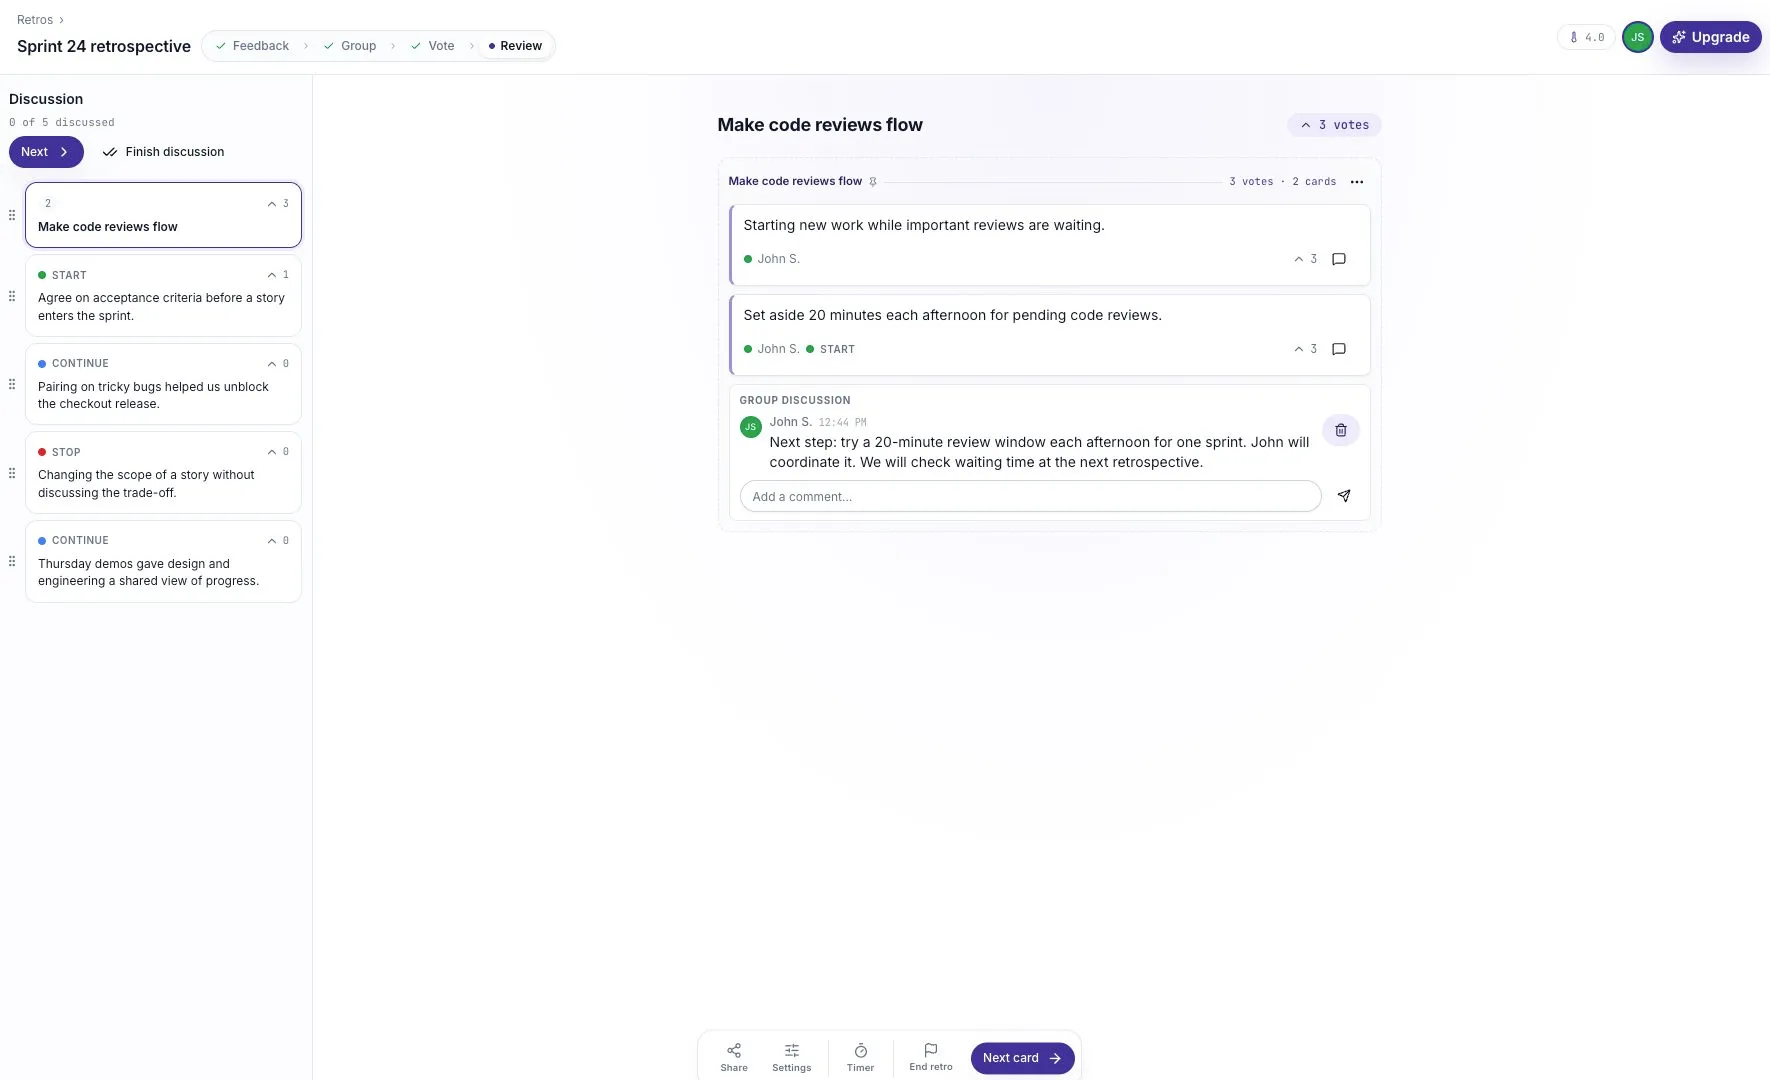
Section titled “Run the Review”Select Next: Review, confirm the move, then select Start discussion. Cards and groups appear in the discussion list.
Select a card in the left-hand list to put it on the stage — everyone sees the selected topic. Next card in the dock advances to the highest-voted card nobody has discussed yet and marks the one you’re leaving as discussed.
Capture decisions in the card’s comment thread. The spotlight is a shared view, not a private one, so anything worth remembering has to be written down. See The Review phase.
End it
Section titled “End it”When no un-discussed cards remain, the dock’s primary action becomes Finish & summarize. On a Live board, it’s End retro throughout. Either way you get a confirmation with the session’s tallies before anything freezes.
Ending is not archiving — the board and everything on it stay readable, just read-only. See Closing a retro.
A note on who facilitates
Section titled “A note on who facilitates”Facilitation belongs to whoever created the board, and there is no control on the board for handing it to someone else. If the facilitator can’t attend, have the person who will run the session create the board.